Focus is very important for your work, if you are out of focus you will lose power or get strange effects when engraving.
This is the most common issue with new users on the k40 machine, the information from the seller how to use the k40 is very limited so this information is not there and a new user tend to search for other problems causing it, when it´s actually the bed and focal distance doing it.
Check out this calculator that helps you set up your lens and distance properly for engraving and cutting.
So, what is focus?
You laser tube has a beam aprox 3-5mm thick bouncing around the mirrors and hitting the lens.
The lens pulls the beam into a focus point in a shape similar to a hour glass.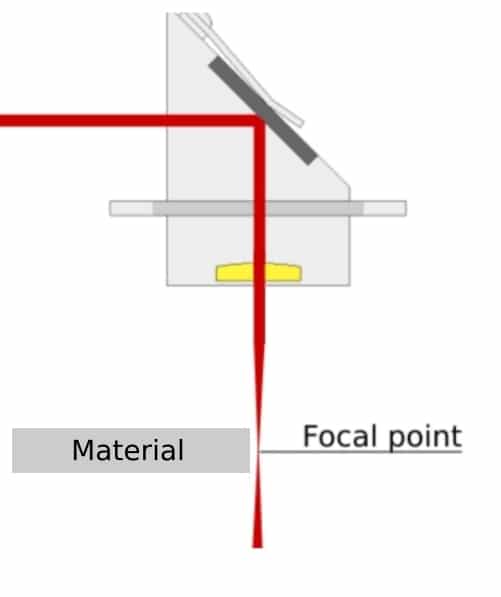
This image shows a easy picture of how the beam looks like in your machine. The thinnes part of the beam shape is your focal point where you should place your material for engraving or cutting.
When engraving you work at the surface, and should then have the focal point at the surface, but on cutting having it in the center of material thickness to keep the cut edge straight.
A leaning edge on a cut is evidence of wrong focus.
Why is proper focus important?
If you have the material too high or too low, the dot size will affect the outcome, for cutting you might get very charred edges, slanted edges or wide cuts. When engraving you get wider beam with less details in your engraving.
Identifying your focus
The K40´s arrives with a 12mm lens with a focal point of 50.8mm
This means the smallest dot is aprox. at this distance from the under side of your lens.
Make a piece of plastic, tooth pic or similar in 50.8mm length and put it against the under side of your lens and see if your bed is in proper height or not.
Or download a lens step-tool here, cut it in acrylic.
If you cannot stand the 50.8mm tool up, your bed is too far up. If you have space between the bed and the tool, your bed is good – for now.
To find the best focal point the ramp test is a good option – more about that later in this article.
Time for a new set of optics for your laser machine? Lens & mirror kits starting at €49
Quick delivery in EU with stock in Sweden!
Check out our spare & upgrade part store here!
Moving your bed
If your test earlier showed that you had more than 50.8mm between under side of the lens and the bed surface, you can skip this step.
The K40´s are made different, not all of them are the same but take some photos of your machine to remember how everything went in, and remove the bed and inspect how your´s is fastened to the machine.
Most users, you, are engraving or cutting on material up to 10mm thick, so i usually recommend putting the bed at a height of 65mm from the lens underside and use scrap pieces to put your material into proper height – read more about this below.
Some beds stands on standoffs, some beds are fastened with L-brackets to the gantry.
Solving this has different approaches, but cutting the legs is one solution, or swap it out for something else holding the bed up. Ask in the Facebook group if you need more ideas.
Here is a picture from one of my machines. I have installed L-brackets on the side of the gantry holding a L-shaped frame as a bed. This is one example of how to mount your bed.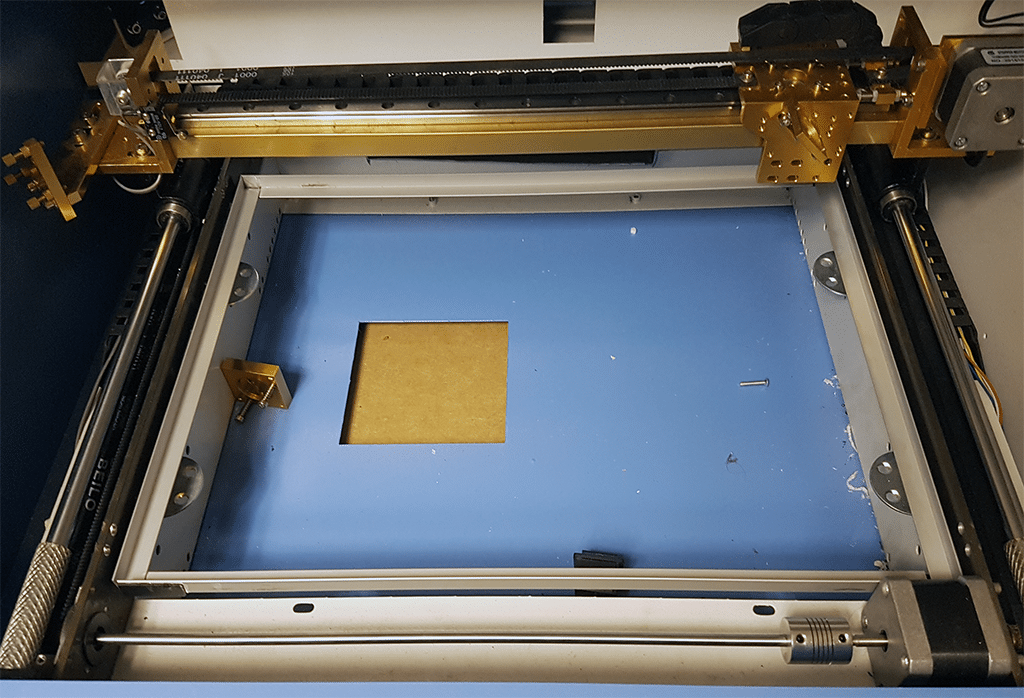
How do I set proper focus?
The K40 machines has one big flaw, and that is the bed.
When you get the machine, proper focus is inside the spring clamp in the bed. Anything you put on top of the bed will be out of focus.
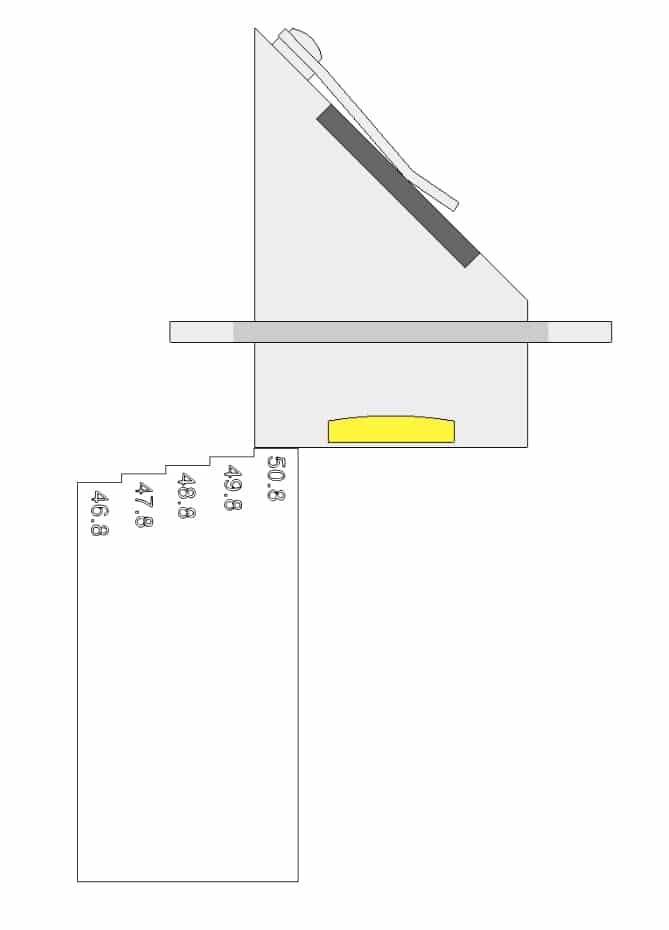
Use the tool you made earlier, in this example i will refer to the tool i have in the download section, i recommend cutting one to use. Please note, it will only work with the standard K40 laser head without any nozzles attached.
For engraving
Use the tool you made earlier, in this example i will refer to the tool i have in the download section, i recommend cutting one to use. Please note, it will only work with the standard K40 laser head without any nozzles attached.
Put the tool under the edge of your laser head on the highest step – use scrap pieces below the material until the surface of the material is touching the bottom of the tool.
If you cannot fit the tool – you need to lower your bed.
For cutting
Use the tool i linked to earlier, depending on the thickness of the material you want to cut you need to use proper step on the tool.
Ideal for cutting is to place the focal length – 50.8mm – in the center of the thickness of the material.
If you have 4mm acrylic, you want 50.8, minus half (2mm) = 48.8mm between material surface and lens under side.
Use the tool, and set the step with 48.8 engraved on the under side of your laser head and use scrap pieces to move the material you want to cut until it touches the tool.
If you cannot fit the tool between the head and material, you need to lower your bed.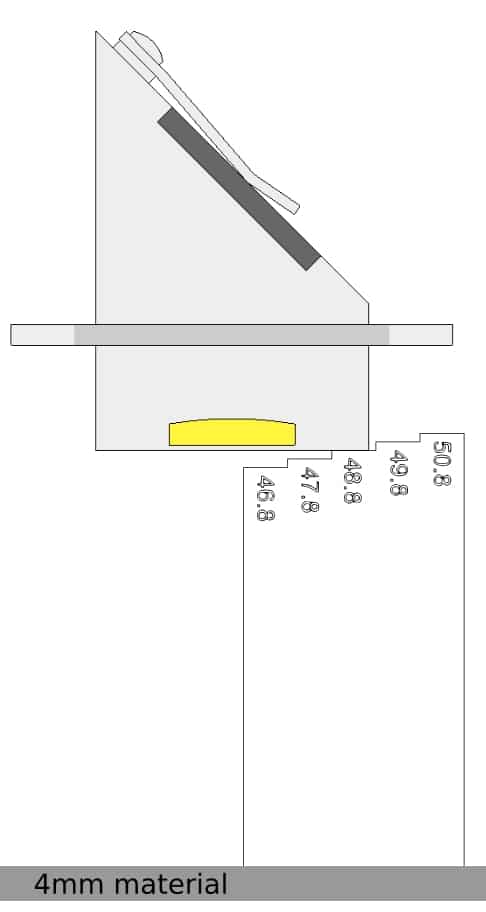
A word on movable beds
There is very common for users to DIY their own movable beds with different solutions, everything from gears and motors to scissor-lifts.
I tend to stop users from this, as the focus is very important one millimeter out will have a effect on your final result.
Installing a movable bed is a lot of work, you need to make it stable so it wont tilt with load on it – and make sure it keeps level in all positions, in all four corners at all times.
Most scissorlifts are very sloppy and putting anything on the bed in one side will tilt the bed really bad. But if you find a good one, use it but make sure its level and remember if you see any troubles not cutting through on one side, or faint engraving on one side – it´s probably your moving bed playing with you 😉
Before installing a movable bed, please make sure your machine is set properly on focus and you have learned how this works before you add more functions (problems) to your machine!
Ramp test
A ramp test is a angled piece of material on your bed to find your optimal focus.
I usually do not recommend this, because the bed in a standard K40 is too far up, the ramp test will not show a proper focus point.
If you want to do a ramp test, make sure you lower your bed enough to get the full hourglass shape of your line.
Source: https://k40.se/about-us/